Polishing and care
A Japanese blade only shows what it has if it is well polished, and only keeps it if it is well cared for. Polishing sets the shape and brings out the temper and the grain, but every polish also takes away a little steel that never comes back. This topic explains how the polisher works, stone by stone; what changes when a blade is repolished; and how a sword is maintained and stored according to the NBTHK, together with its iron guard, its cord and its bag.
What togi is, and who does it
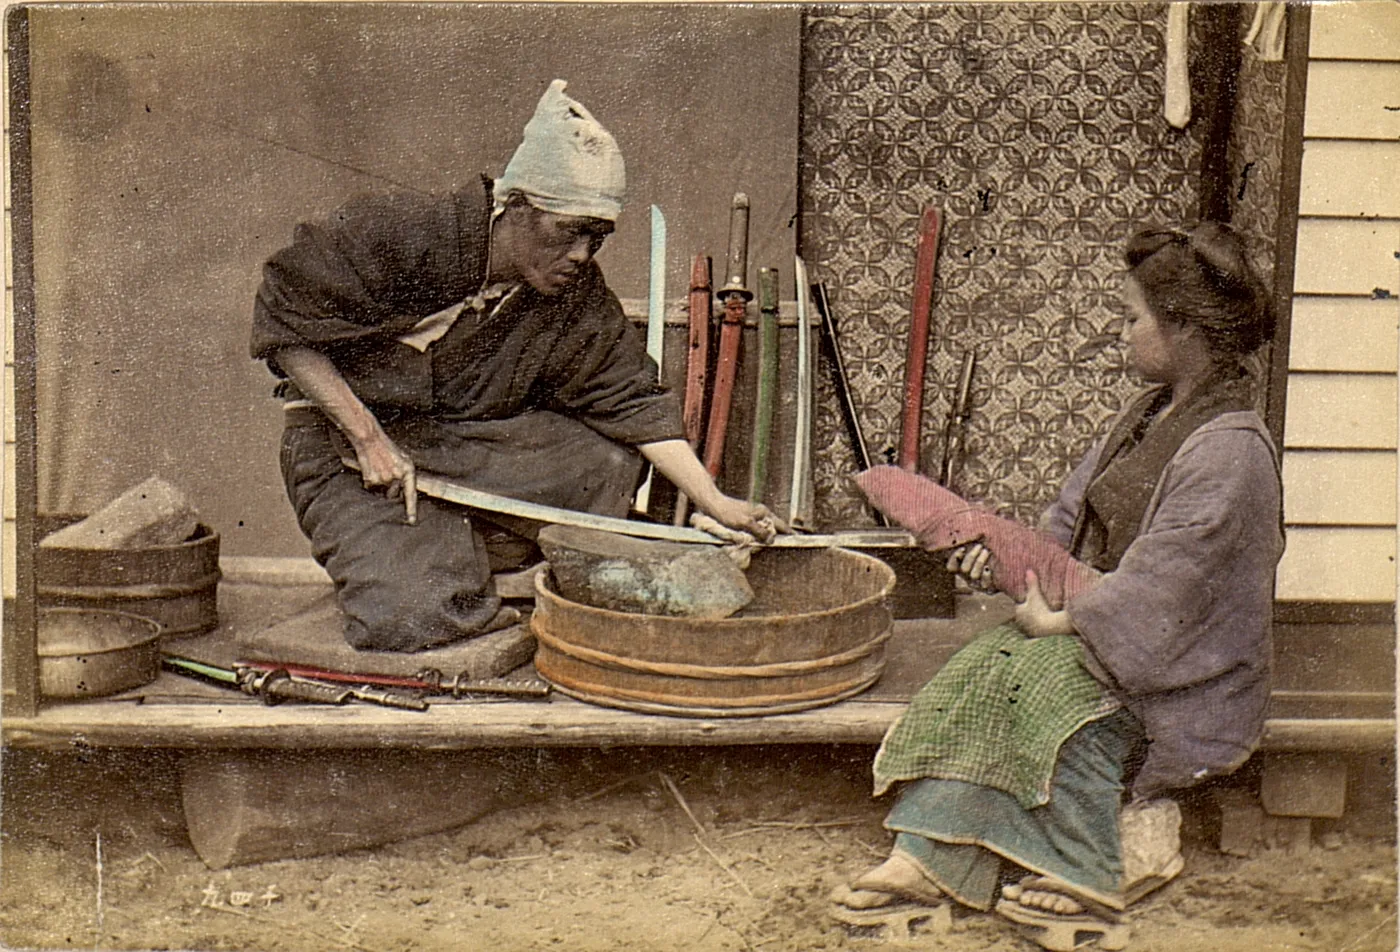
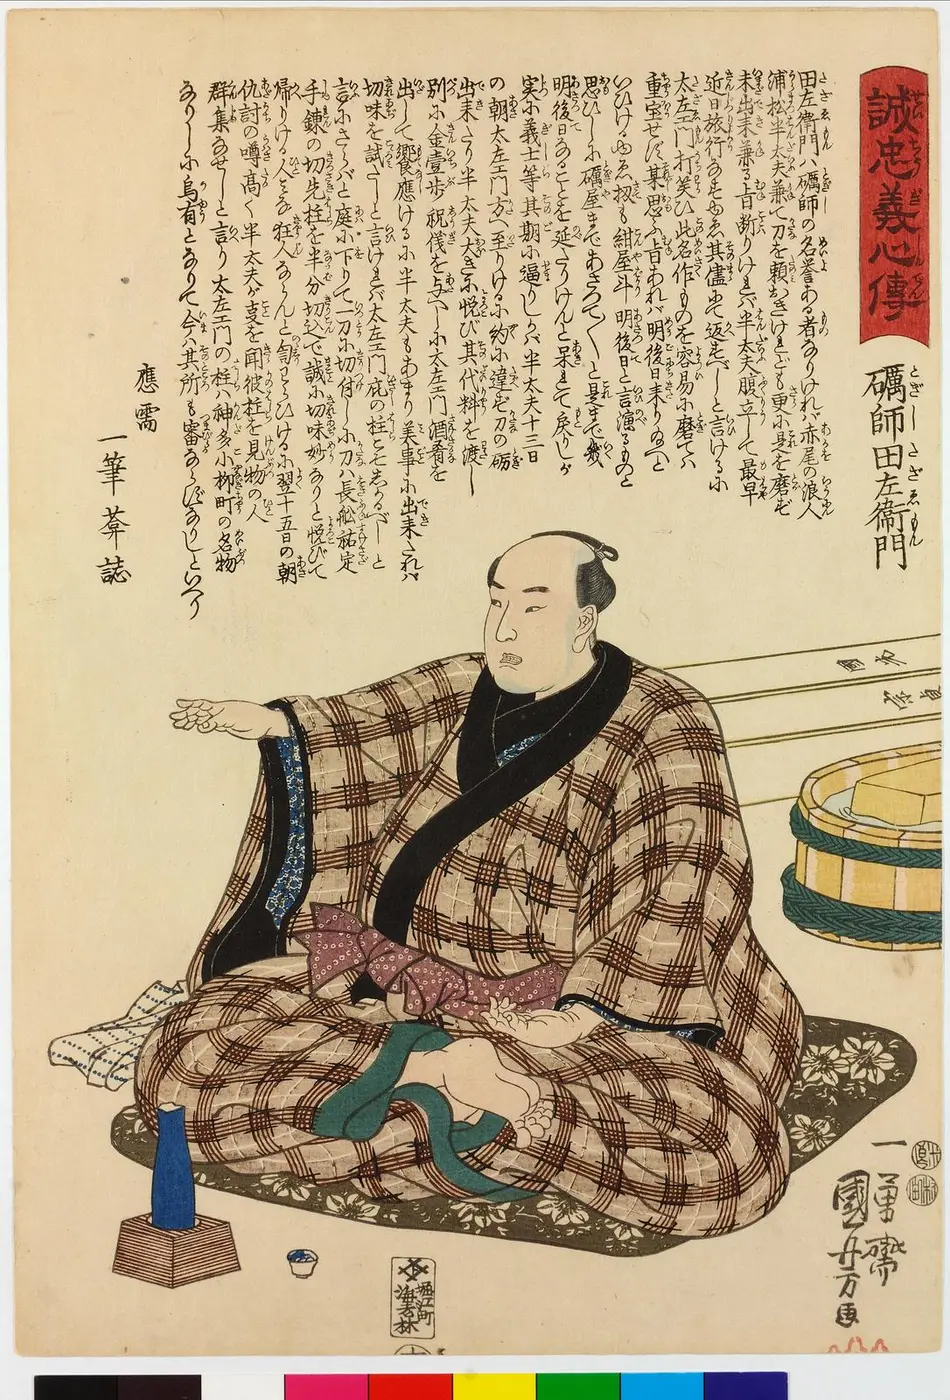
Togi (研ぎ) is not sharpening. The polisher, the togishi (研師), works the whole blade except the tang: he sets its geometry, evens out the surfaces and leaves each zone with a finish of its own —the dark ji, the white temper, the burnished shinogi-ji and back, the matt point. An unpolished or badly polished blade shows neither its hamon nor its hada, so it cannot be judged; a bad polisher, on the other hand, can ruin for good a shape that had survived for centuries.
The craft is old, and separate from the smith's. The NBTHK places the first record of specialist polishers in the time of the retired emperor Toba, in the twelfth century, and a sword book from the end of the Kamakura period, the Kanchi-in-bon Meizukushi (観智院本銘尽), which lists mainly smiths, already names two of them. Smiths are said to have polished their own work in Muromachi and earlier. From the fourteenth century the Hon'ami (本阿弥) family, whose founder Myōhon served Ashikaga Takauji, cared for, polished and appraised swords for the Ashikaga, the Toyotomi and the Tokugawa; their certificates, the origami, still accompany many old blades (see «NBTHK papers»).
Reaching a clean polish takes years, and it cannot be faked: a polisher's shortcomings are plain to him and to his colleagues. For centuries, moreover, most blades never received today's artistic polish. In Muromachi, and above all in the Sengoku wars, there was no time: nicks were removed, the shape restored, and the blade was left in a shiratogi (白研ぎ), a «white» polish with no finishing that often stopped at the koma-nagura. Only the blades of the great daimyō, and those kept as works of art, got more. The careful finish spread with the peace of Edo, and today's shiage technique took shape in Meiji.
Today the craft rests on a few dozen polishers —about fifty are estimated in Japan—, mostly in two great lines, the Hon'ami and the Fujishiro. Five have been recognised as Living National Treasures: Hon'ami Nisshū and Ono Kōkei (1975), Fujishiro Matsuo, Nagayama Kōkan (1998) and Hon'ami Kōshū (2014). A full polish takes from ten days to several weeks, depending on the state the blade arrives in.
Shitaji-togi: the shape, stone by stone
Polishing has two stages. The first, shitaji-togi (下地研ぎ), works on the shape: it removes rust and marks, straightens, defines the ridges and distributes the blade's flesh. It is the hardest stage and the one that decides everything, because the right geometry has to be reached while removing as little steel as possible.
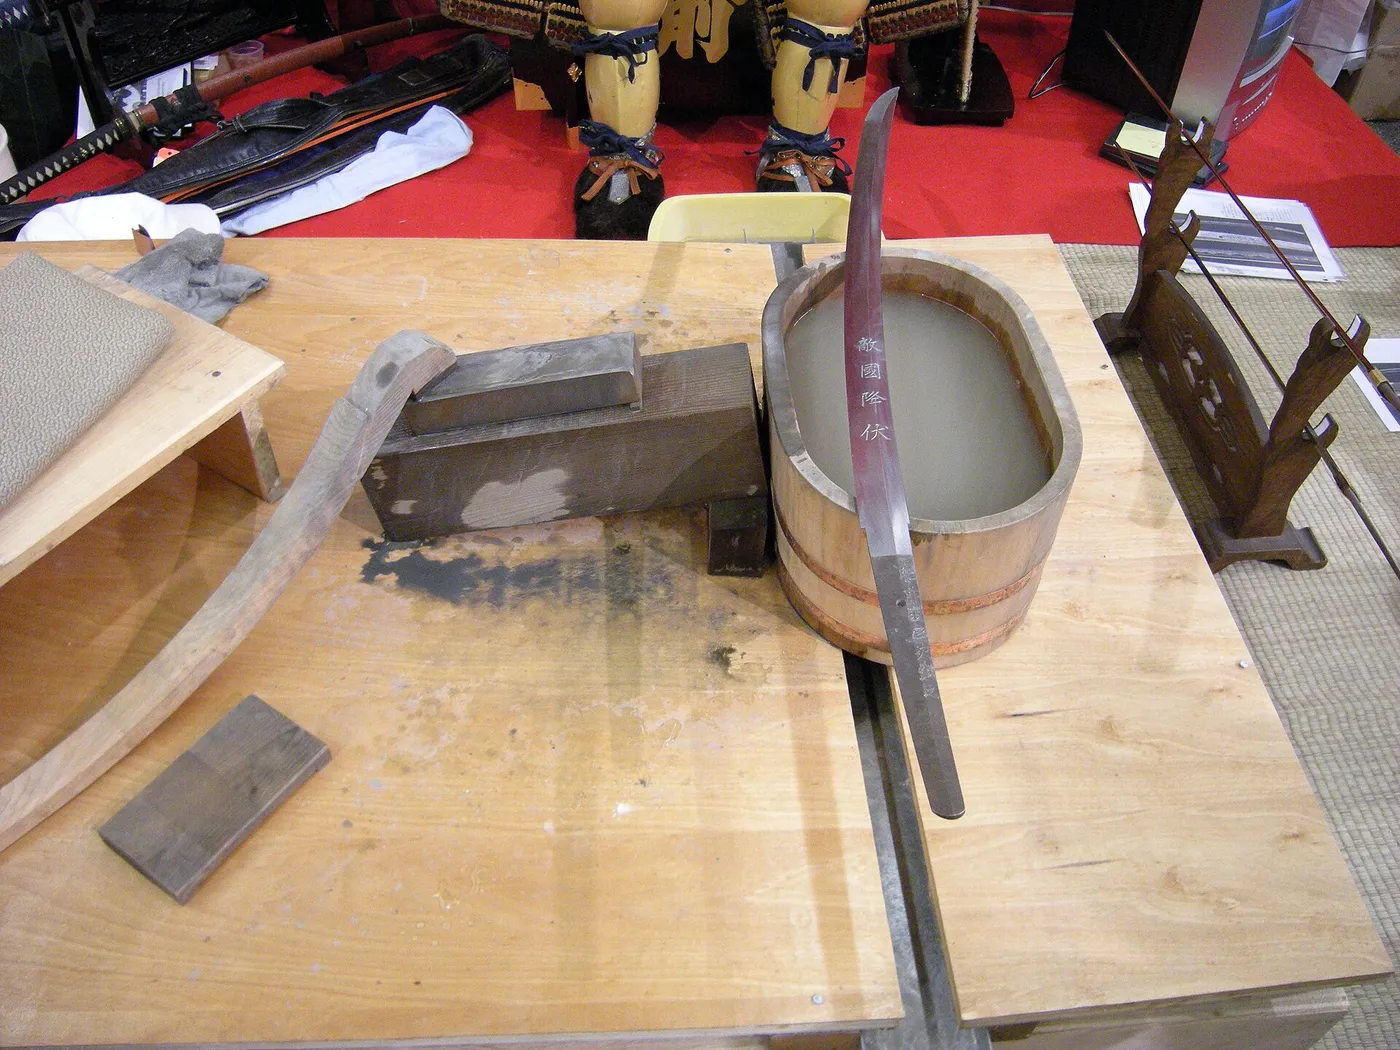
Before touching a stone, the polisher checks the blade and, if needed, straightens it with a wooden lever, the tamegi (矯め木). A newly forged blade reaches him already rough-ground by the smith himself, the kaji-oshi (鍛冶押し). It then goes through ever finer natural stones, always wet; if it carries deep rust, it starts earlier on a very coarse artificial stone, the kongō-do (金剛砥). This is the order the NBTHK gives:
| Stone | Where it comes from | What it is for |
|---|---|---|
| iyo-do (伊予砥) | Ehime | Removing rust and setting the shape. |
| binsui-do (備水砥) | Amakusa, in Kumamoto | Erasing the marks of the previous stone and adjusting the blade's flesh (niku). |
| kaisei-do (改正砥) | Yamagata | Erasing the binsui marks. |
| chū-nagura-do (中名倉砥) | Aichi | Refining the surface and the shape. |
| koma-nagura-do (細名倉砥) | Aichi | Erasing every mark; the hamon and the hada begin to show. |
| uchigumori-do (内曇砥) | Kyoto | In two hardnesses: the ha-do whitens the temper and the harder ji-do brings out the grain of the ji. |
Sources do not agree on the exact grit of each stone, so it is not given here: what matters is the order, from coarsest to finest. The direction of the strokes also changes with each stone —across the blade at first, then more and more oblique, and finally along its length—, and each stone has to erase completely the marks of the one before: when the marks of the last step lie parallel and orderly, the surface is free of irregularities.
Around the chū-nagura stage the blade leaves the workshop so that the habaki-shi can make its collar and the sayashi its wooden scabbard, because its dimensions will no longer change.
Some details of the workshop never show in the result. The face of the stone is not quite flat: it is left slightly domed to respect the convex body of the blade. The water in the bucket is made alkaline, with straw ash or bicarbonate, so the steel does not rust while it is worked. And the natural kaisei-do of Yamagata has run out: an artificial one is used today, and never on the point.


Shiage-togi: the finish
The second stage, shiage-togi (仕上げ研ぎ), no longer changes the shape: it brings to light what the steel holds inside. It is done with paper-thin flakes of stone moved with the thumb, with powders and with a steel rod, and every school of polishers keeps its own recipes.
| Step | With what | What it achieves |
|---|---|---|
| hazuya (刃艶) | A flake of uchigumori ground down to the thickness of paper and backed with Yoshino paper. | On the temper, it brings out the nie and the nioi. |
| jizuya (地艶) | A flake of harder Narutaki stone, backed with paper or crushed with the fingernail, depending on the school. | On the ji, it refines the surface and makes the hada visible. |
| nugui (拭い) | Iron oxide from the forge, calcined and ground, in clove oil, filtered through paper and spread with cotton. | It darkens the ji and gives it lustre. |
| hadori (刃取り) | The hazuya again, following the hamon. | It gives back the white to the temper, which the nugui had darkened as well. |
| migaki (磨き) | A polished steel rod, after degreasing with horn powder and dusting with insect wax. | It burnishes the shinogi-ji and the back to a mirror. |
| narume (ナルメ) | The best hazuya, on a flexible backing. | It draws the yokote line and leaves the point with a matt finish like frosted glass. |
The hadori does not trace the hamon, nor does it have to: it is the polisher's reading of the temper, and each school goes about it in its own way; according to the Japanese Wikipedia, the Hon'ami start from the back side and the Fujishiro from the edge. At the end almost all of them leave their signature: the nagashi (流し), burnished lines next to the habaki and on the back of the point, nearly always in odd numbers. They are not needed for a polish to be good, and some polishers leave them out.
The recipes vary more than one might think. The nugui may use camellia oil instead of clove, and some schools add gold or malachite powder to it. Some glue the jizuya to paper (hari-jizuya, 張り地艶) and others crumble it with a fingernail (kudaki-jizuya, 砕き地艶). Burnishing also comes in two ways: a hard migaki leaves the shinogi-ji like a mirror but can hide poor steel; a soft one, or none at all, shows the steel as it is, and some connoisseurs prefer it. Finally, the nagashi say something about the craftsman: there are usually three at the point and seven or eleven by the habaki, and straight, parallel, evenly spaced lines are a sign of a good hand, because a clumsy polisher cannot draw them.

Keshō-togi and sashikomi: two ways of showing the same blade
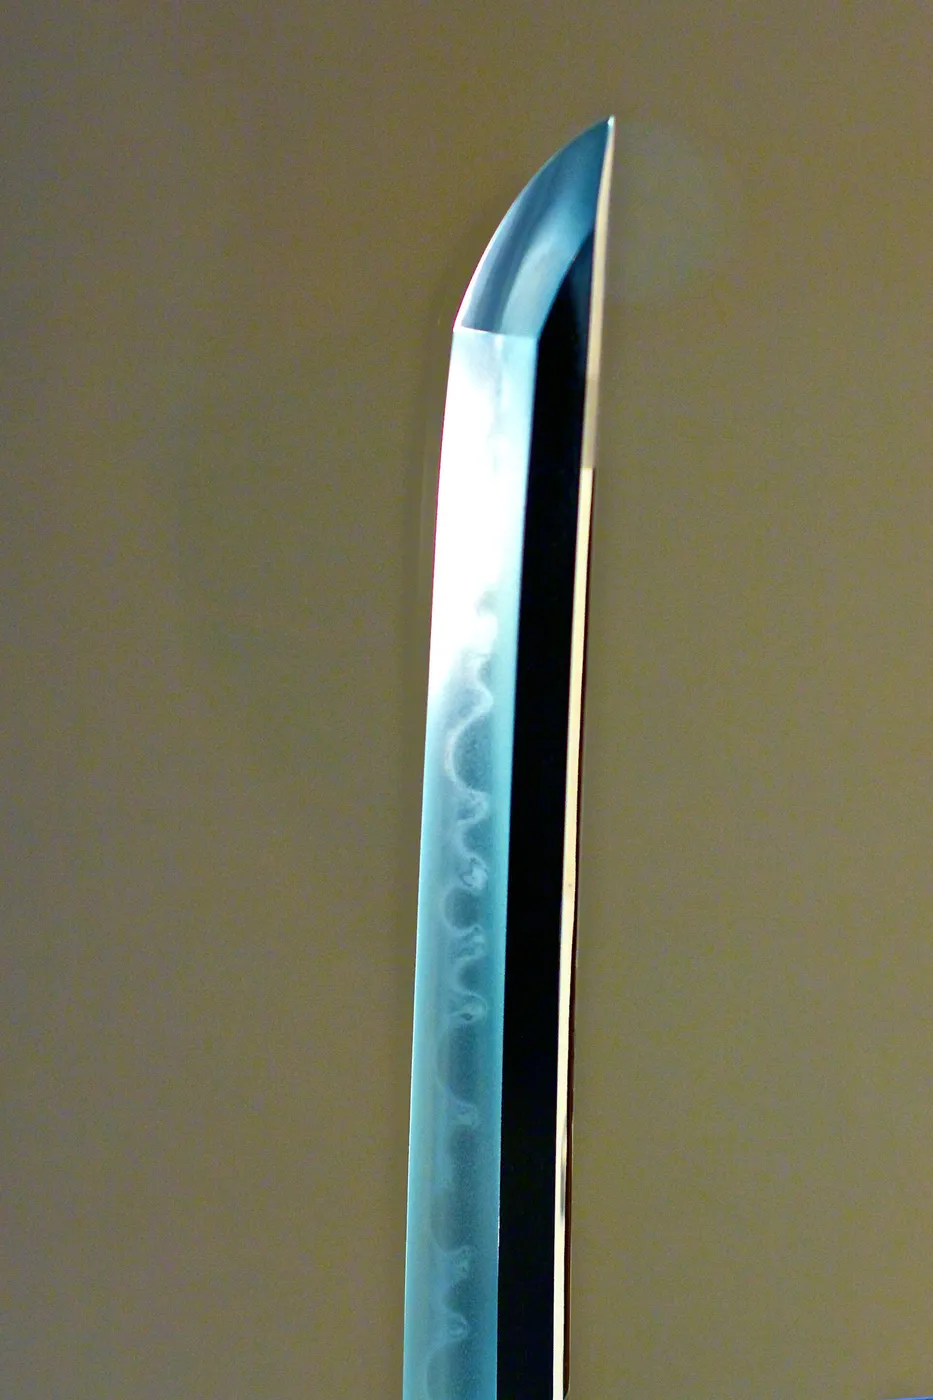
The dominant finish today is keshō-togi (化粧研ぎ), the «make-up polish»: black, glossy ji, white hadori and a mirror shinogi-ji. It was established in the Meiji era by Hon'ami Heijūrō Narishige (本阿弥平十郎成重), who died in 1882, on the basis of the earlier style, and developed by his successor Hon'ami Ringa, who died in 1927. It is a striking finish and an easy one to read: the temper shows at a glance, in a display case or in a photograph too.
The keshō-togi won out for more than taste. In Meiji, the edict that banned the wearing of swords, the Haitōrei (廃刀令), turned the blade into a collector's object and multiplied the enthusiasts. And electric light let polishers work at any hour and see the temper far better than by candlelight, which pushed the hadori forward. By the end of the twentieth century it was reckoned that eight polishers in ten preferred the hadori, and that nine blades in ten at the NBTHK's annual polishing contest were polished that way.
The earlier style is sashikomi-togi (差し込み研ぎ). Sources do not describe its steps in the same way, so it is best defined by what one sees: there is no white drawn apart from the hamon; the temper appears as it is, only somewhat lighter than the ji, and the steel is shown without make-up, with its virtues and its faults. It is a more subdued finish, which brings out utsuri well and ages better, and it is kept mostly for blades with a crisp temper that can carry it.
The make-up has its price: it can cover a blade's flaws and hide the subtleties of the steel. Some connoisseurs prefer sashikomi for exactly that reason. Workshops tell of a famous polisher, whose keshō-togi lifted blades two or three steps in buyers' esteem, who kept the masterpieces of his own collection in the old style; and the Tokugawa Art Museum in Nagoya holds blades with Edo polishes of this kind. Some polishers read the character of the edge in the brightness of a sashikomi temper: a dull temper would be tougher; a very bright one, sharper but more brittle. It has been observed that many kotō blades have a dull temper, as if the smith had sought a resilient edge rather than a very hard one.
The difference matters when looking. In a keshō-togi the edge of the white band is the polisher's work, and the true hamon —the line of nie or nioi— lies inside it. It is found by tilting the blade under a point light, which makes the real line shine and dims the white of the hadori (see «The temper line up close»).
There are other finishes, less often seen. A polish finished with hazuya alone leaves the whole blade white and dull, but it shows the temper, the utsuri and the activity of the steel like no other: it is the best for learning to look at a temper. The so-called water finish, mizu-shiage (水仕上げ), puts hazuya on the temper and jizuya on the rest, without the oil of sashikomi, and comes out clearer and whiter. In every style, the point of a blade with a shinogi is always finished with hazuya; that is why the point is said to be the best place to study a blade's quality.

What a repolish changes
The hamon is in the steel, and an ordinary repolish removes so little that it does not move it. What changes is how it looks: the pattern of the hadori, the colour of the ji, the brightness of the nie and nioi, the apparent width of the temper. That is why the same blade «looks different» in the hands of another polisher, and why an old and a recent photograph of the same piece may not look alike. Something similar happens with the grain: the pattern of the layers does not change, but the polisher can bring out the layers more, or the particles of the steel more.
Workshops keep cases that show it. A tantō of fine ko-itame with chikei, calm and discreet, came out of a second polish with a strongly marked masame near the back and a much louder temper: the first polisher had brought out the particles of the steel, the second the layers. A Ko-Aoe Moritoshi tachi with a century-old polish had deep rust in the middle of the edge; its owner feared a repolish would spoil the shape, and a Hon'ami repolished it without touching it, yet the blade changed character: the ji turned into a very fine grain with silvery jinie, the large hada and the misty utsuri vanished, and the nie of the temper became bright and strong. From gentle to forceful, with the same steel. And sometimes the change is costly: a blade polished by Hirai Chiba (平井千葉), a polisher of great renown, lost most of its value when someone else repolished it.
What does not come back is the steel. Every polish takes a layer away, and the tang, which is never polished, keeps its original thickness: comparing the two gives an idea of how much the blade has lost. A polish that removes a lot does change the essentials: the temper flattens and narrows, the curvature drops and the blade may no longer fit its scabbard. Flattening the blade's flesh makes it shine more in a display case, but weakens the edge and the point (see «Shape (sugata)»). Accumulated wear has a name, tsukare (疲れ), and is explained in «Blade condition: flaws and deceptions».
There is the story of a smith whom an old iai master asked, years later, to lighten the blade he had forged to measure for him, because it had grown too heavy. It was taken down in stages, and the master tried it each time. In the end the temper, a kawazuko-chōji, had become a ko-midare with tobiyaki, the curvature had dropped, and the blade no longer went all the way into its scabbard. Wear, moreover, is not even: the point wears more than the base, so the curvature seems to gather low down (koshizori), the yokote and the thickest part of the blade move towards the tang, and the machi lose depth; when they disappear, they have to be recut with a file. It has also been observed that some renowned polishers take body off sound blades, in the hiraniku or at the point, because a flat surface shines more and such a point looks wider in a display case or a photograph. In the hand, that shape disappoints: a blade's lines are not its shape.
Hence the practical rule: polish only when needed —for rust, for a nick, or because the old polish no longer lets the blade be seen— and always with a professional polisher. Today blades are often polished only to be submitted for examination, and polishing without need is a risk. And never at home: no sandpaper, no pastes, no loose stones; a rust spot is the polisher's job.

Maintenance according to the NBTHK
Maintenance, teire (手入れ), is not polishing: it means replacing old oil with fresh oil and checking the blade. The NBTHK's guide at its Japanese Sword Museum is the reference; there are other practices, and where sources disagree this is noted below.
Handling first. The sword always stays in its bag and is carried in the right hand, hilt upwards. When drawing and sheathing, the edge faces up, and the blade comes out slowly after loosening only the habaki from the mouth of the scabbard (koiguchi wo kiru). The blade is not touched with the fingers, nor is one to talk over it: sweat and saliva make it rust.
The tools:
- mekugi-nuki (目釘抜): the brass or bamboo punch used to push out the peg of the hilt;
- uchiko (打粉): a small ball of very fine stone powder, wrapped in Yoshino paper and then in cotton or silk;
- two nuguigami (拭い紙), soft, well-kneaded papers: one to remove the old oil and one to remove the powder (a washed, unsized flannel also works);
- chōji-abura (丁子油), clove oil, and a small piece of cloth or paper to spread it.
The sequence, summed up in the figure:
- remove the mekugi;
- draw the blade and take off the tsuka with light taps on the wrist, gentle at first: a tantō can fly out;
- remove the seppa, the tsuba and the habaki;
- run the first paper from the base to the point, without pressing and with care at the kissaki, to take off the old oil;
- dab uchiko on both faces;
- remove the powder with the second paper;
- look for rust or any damage;
- oil with a thin, even coat;
- on the tang, a little oil, with the fingers, without leaving it sticky;
- reassemble and sheathe.
Frequency, according to the NBTHK's current text: a freshly polished blade, roughly once a month for the first six months; one with an old polish, twice a year, in spring and autumn. Other guides ask for closer checks at first, and all agree that a freshly polished blade needs watching closely.
On two points the sources disagree. Uchiko is stone powder, a mild abrasive: the NBTHK includes it in the routine, while other specialists ask for moderation —or none at all— on a recent polish, because in the long run it scratches the finish. And oil on the tang: the NBTHK asks for a little, and some consider oiling the tang of an old blade unnecessary.
Workshop practice adds a few details. When drawing a mounted sword, the thumb pushes the tsuba; on a shirasaya, the thumb does not rest on the edge of the hilt, which soon gets dirty. The blade is laid on a clean cloth, never on a carpet. Japanese paper, flannel, soft lotion-free tissues, chamois or microfibre all do for the old oil. As for uchiko, some polishers hold it indispensable on a sashikomi: over the years, that gentle polish of oil, powder and cloth brings out the utsuri and details that a fresh polish does not show, and some blades treated this way for a long time have a look no new polish can match. The same people advise against it on a keshō-togi, because it wears off the make-up, and there they clean with microfibre. And beware of cheap uchiko: some contains bone powder.

Where and how to store it
The most common cause of rust is not the air but rubbing: a worn or dirty scabbard touching the blade, saya-atari (鞘当り). The remedy is to take the scabbard to the sayashi or to have a new one made. For storing the blade, the NBTHK recommends the shirasaya rather than the old mounting; it used to be called the «resting scabbard», yasume-zaya (休め鞘), or the «oil scabbard», abura-zaya (油鞘). The shirasaya is closed with rice paste, sokui (続飯), so that it can be opened and cleaned inside; never with modern glue. The mounting is kept separately, assembled on its tsunagi (see «Mounting styles (koshirae)»).
Two more details. The shirasaya is made of hōnoki (朴の木) wood, which shrinks in winter: the blade may be harder to draw, and it must not be forced. And an old Hon'ami origami is kept folded along its own creases, never flattened.
The sword is stored lying flat, not standing, because the oil runs down and collects at the point; in a dry place, away from the sun and from heating. A paulownia-wood cabinet is ideal. No camphor or mothballs nearby: they make steel rust. The mounting, on the other hand, does not want too dry a place, which punishes the lacquer and the wood. The registration certificate and the papers are kept separately, in a sleeve.
If rust appears, it goes to the polisher: it is not scraped with a horn spatula, or with a coin, or with anything else. A spot of rust left to grow ends as pitting, and pitting can only be removed by taking steel away.
The iron tsuba, the sageo and the bag
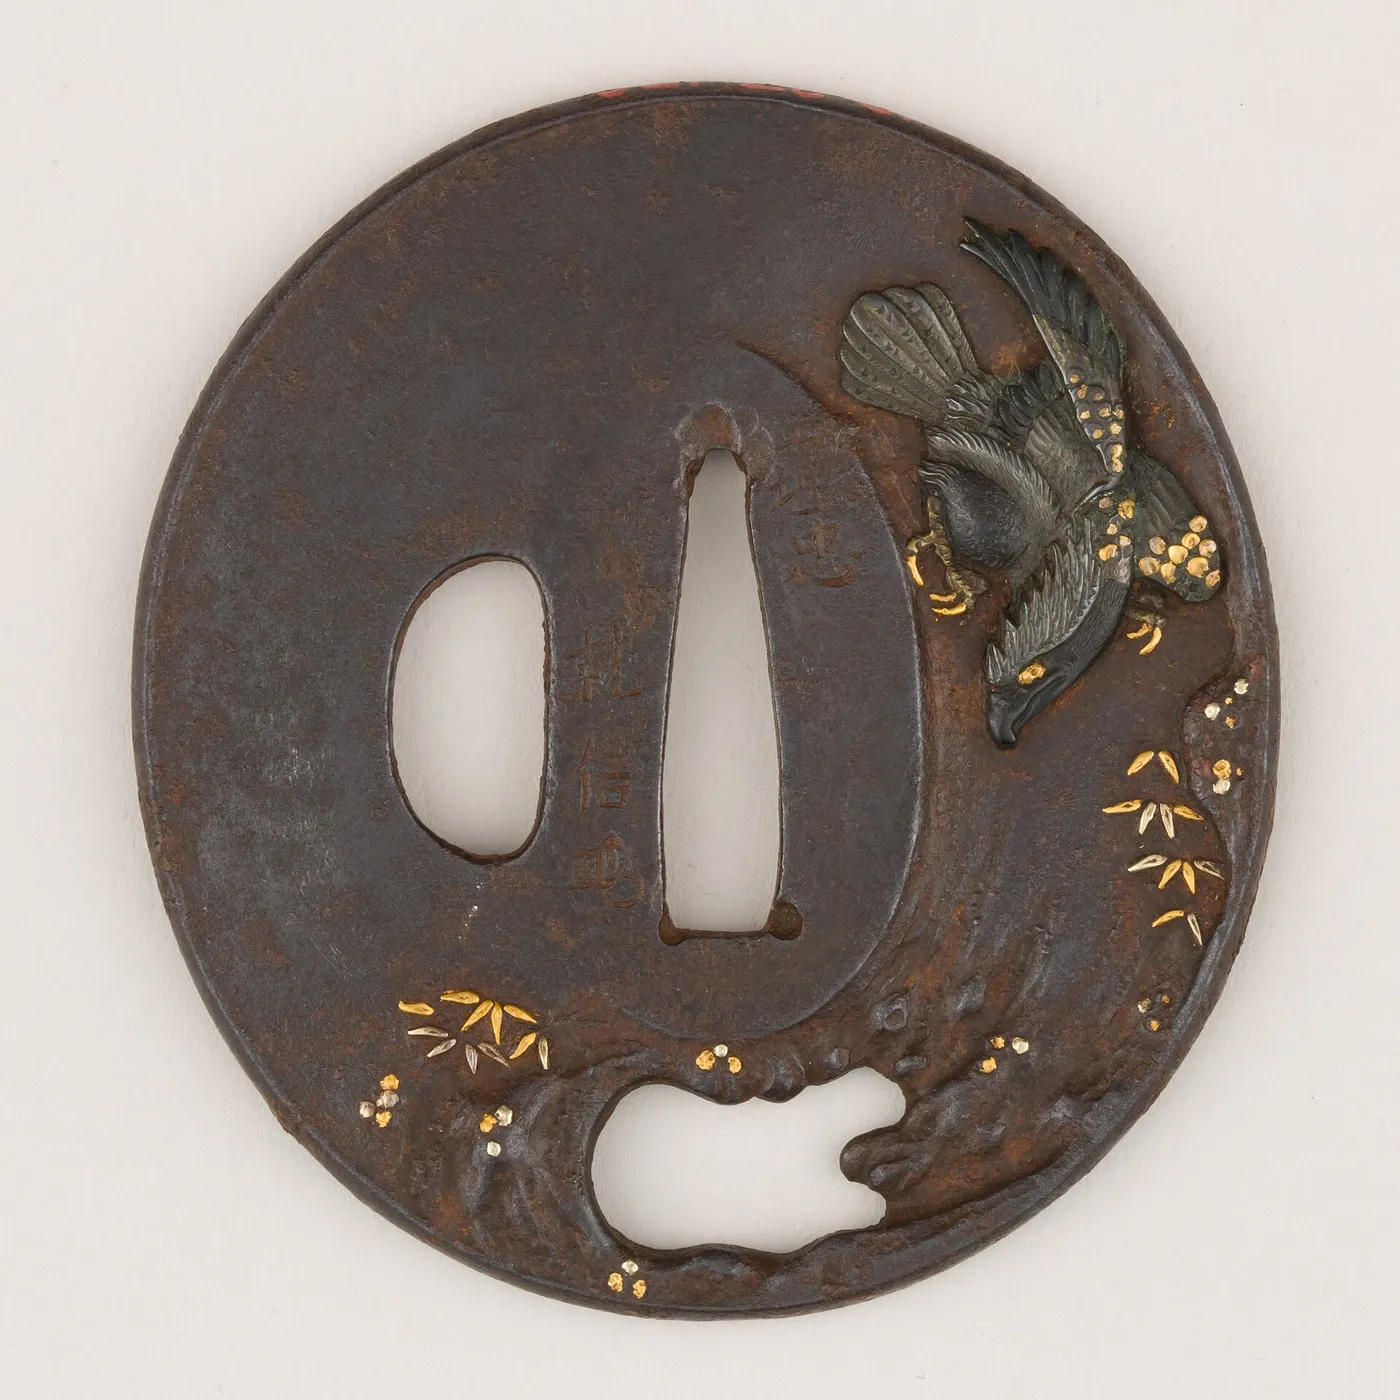
An iron tsuba is not cared for like a blade. Its surface is a patina of black oxide, kuro-sabi (黒錆), stable and prized, which is not to be removed; what needs watching is red rust, aka-sabi (赤錆), which does spread. The traditional practice is to remove it by rubbing with something softer than iron, such as deer antler, and then to rub with a cotton cloth, for a long time and patiently, until the black patina regains its sheen: it is the work of months. No wire brush, sandpaper or metal polish, which take the patina away along with the rust. On oil and wax opinions differ: the traditional practice does without both, and some accept a minimal coat. In storage, a tsuba breathes better in the open than shut in its box all the time.
There are more nuances. Deer antler has just the right hardness: it takes off the red rust and spares the black; failing that, something similar will do, such as the plastic handle of a brush. Those who reject oil and wax explain it this way: the coating traps moisture, and the rust keeps working underneath, where it can no longer be removed. If the tsuba has gold inlay, one works around it with great care. And putting it in the sun now and then brings hidden red rust to the surface, to be removed afterwards.
Beware too of cast-iron tsuba. They are late copies made by casting, mostly of designs of the Owari and Akasaka schools; when they were made is discussed in «The mounting in detail». They can be recognised by the trace of the mould seam in the openwork, by a slightly smaller size —the metal shrinks as it cools—, by dull edges and by an odd patina. They are so brittle that one blow breaks them: they are for looking at, never for mounting on a sword.
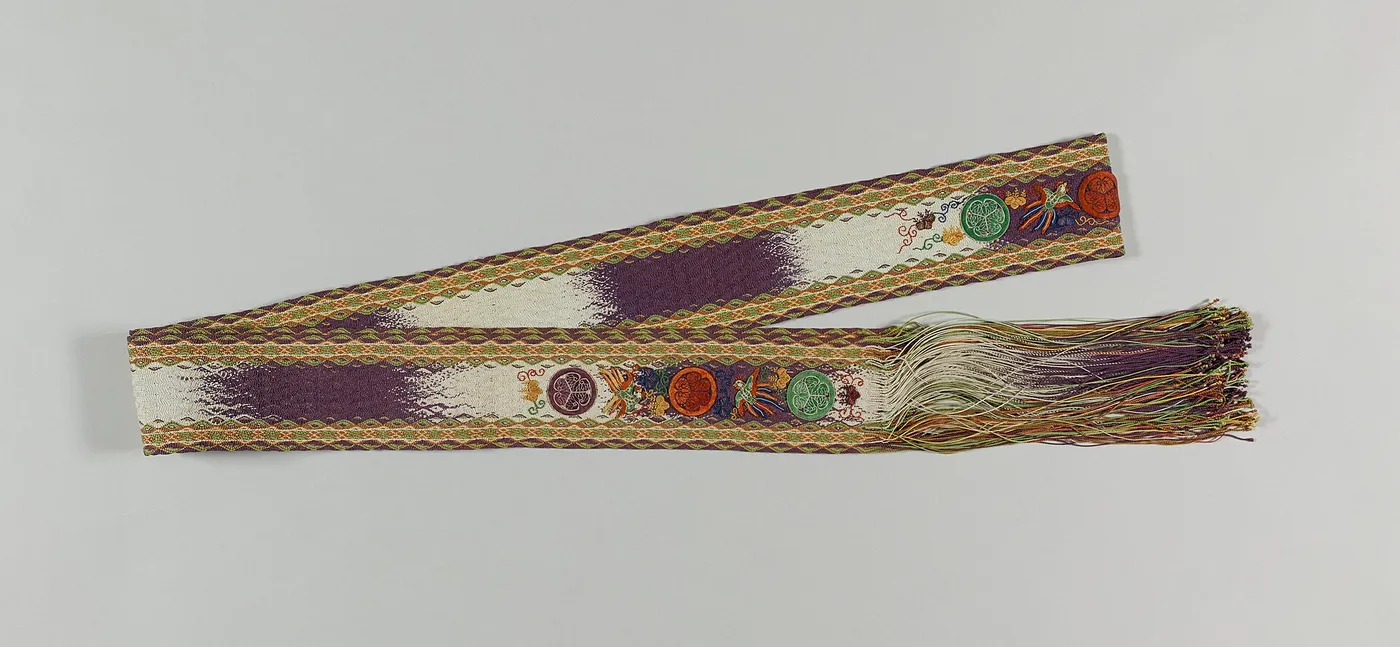
The sageo (下緒) is the scabbard cord, nearly always a flat silk braid. It passes through the kurigata (栗形) and was used to tie the scabbard to the obi so that it would not come out with the blade when drawing; once the kaerizuno (返角) hook became common, it remained as an auxiliary and an ornament. It had other uses —a wrist loop, tying the tsuba to the scabbard to show one would not draw, tucking up the sleeves— and in Edo its colour came to be regulated by rank. Many iai schools keep their own way of wearing it.
Some tsuba have two small holes to tie them to the scabbard: this was a Satsuma custom, where parents would even wire the tsuba to the scabbard so that boys could not draw in training. And the cord was not always worn the same way: in the sixteenth century the long end hung behind the scabbard and the short one was tucked into the obi; in the formal parades of the nineteenth, the long end hung behind with the short one knotted to it.
The knots in which sageo are seen today are for displaying, storing or carrying the sword: at the belt, the cord hung loose or was tucked into the obi. The sei-musubi (正結び), the formal knot of Edo, comes undone with a single pull; the noshi-musubi (熨斗結び) folds the cord along the scabbard; the maki-musubi (巻結び), wrapped around, is for carrying, but left for years it marks the lacquer and wears out the cord itself; the showy daimyō-musubi (大名結び) is for display only. The more complicated the knot, the more the silk suffers: for storing the sword a simple one is enough.
The sei-musubi is also called chō-musubi (蝶結び), and the daimyō-musubi rōnin-musubi (浪人結び); there are also the tantō-musubi (短刀結び) and the myōga-musubi (茗荷結び), which finishes off the ends. The elaborate knots, which no longer hold anything, are said to have been the fashion of rich merchants, for whom a sword at the waist was a mark of standing rather than a weapon.
The bag, katana-bukuro (刀袋), is put on by sliding the sword in kojiri first, with the seam on the back side; the excess is folded, the cord is wound from the bottom upwards and closed with a knot. Brocade bags are handsome but hold moisture: they need airing, and what they hold needs watching.

Further reading
- NBTHK · handling and preservation The NBTHK's guide at its Japanese Sword Museum: tools, maintenance steps, frequency and storage. In Japanese.
- NBTHK · from forging to polishing How a sword is made, with the polishing stones in order and where they come from. In Japanese.
- Wikipedia · Japanese sword polishing (in Japanese) The stones in order, from rough work to finish, the Hon'ami house and the sashikomi polish. In Japanese.
- Japanese Sword Index · the world of a togishi How a polisher works, stone by stone, and the years of apprenticeship of the craft. In English.
- Wikipedia · the sageo The scabbard cord: materials, uses, knots and its regulation in Edo. In Japanese.
- Wikipedia · Japanese sword polishing An overview of polishing, with its stages and styles.